Gravity Form to Google Sheet
Automatically send form data to a Google Sheet
This article will demonstrate how to:
- Create your Gravity Form
- Create your Google Sheet
- Configure and use Google App Script
Step 1: Create your Gravity Form
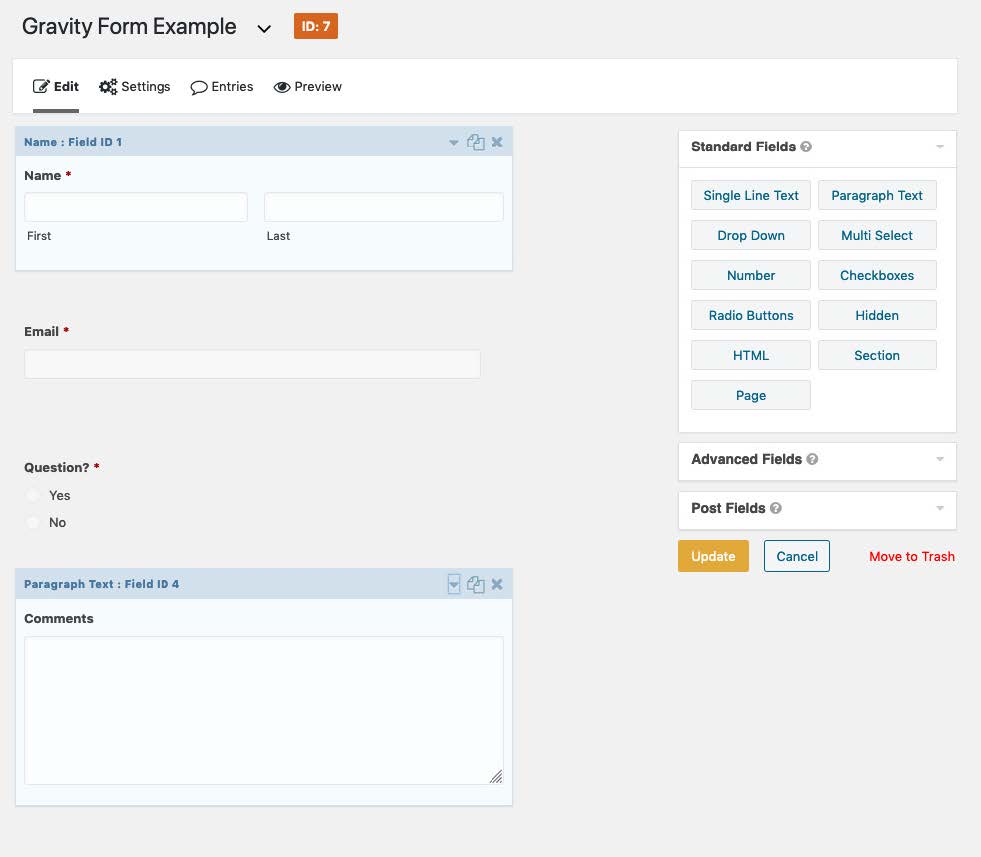
In the Gravity Form Edit screen, you can add the form fields that you want to capture.
Step 2: Review your Field Settings
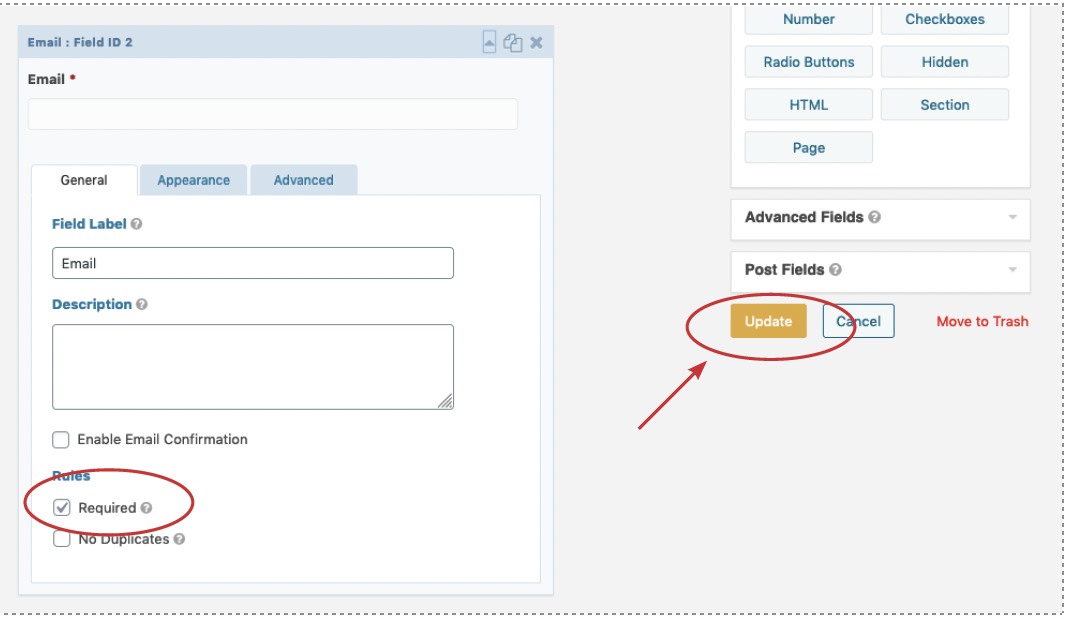
Review the fields to make sure you have set the fields to “Required” so that the user must enter that data. Once all fields are correctly configured, update the form.
Step 3: Create Your Google Sheet

The form should include a header row that includes the input fields from your form. For a form field with multiple input fields, remember to create columns for each data point. The example used in this article has a Name field in the form and columns for the two data fields of First Name and Last Name.
Step 4: Use the Google Apps Script tool
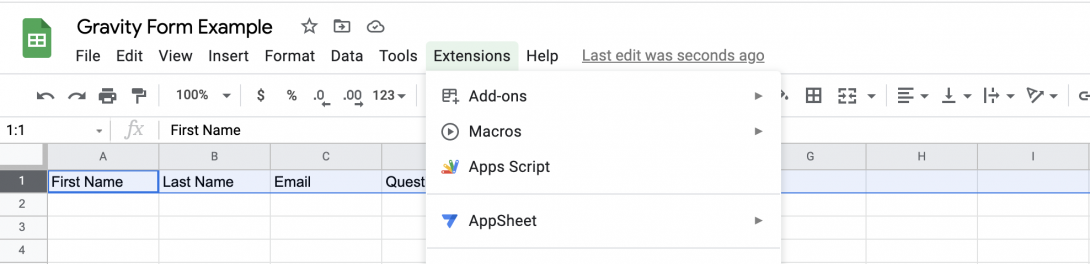
The Google Apps Script tool allows you to add code that will send the form data to the Google sheet.
Step 5: Find the Sheet ID and Name

Remove anything that’s currently in the editor, and copy and paste the code below, making sure to replace the sheet ID and the sheet name.
Step 6: Place the Code and Authorize
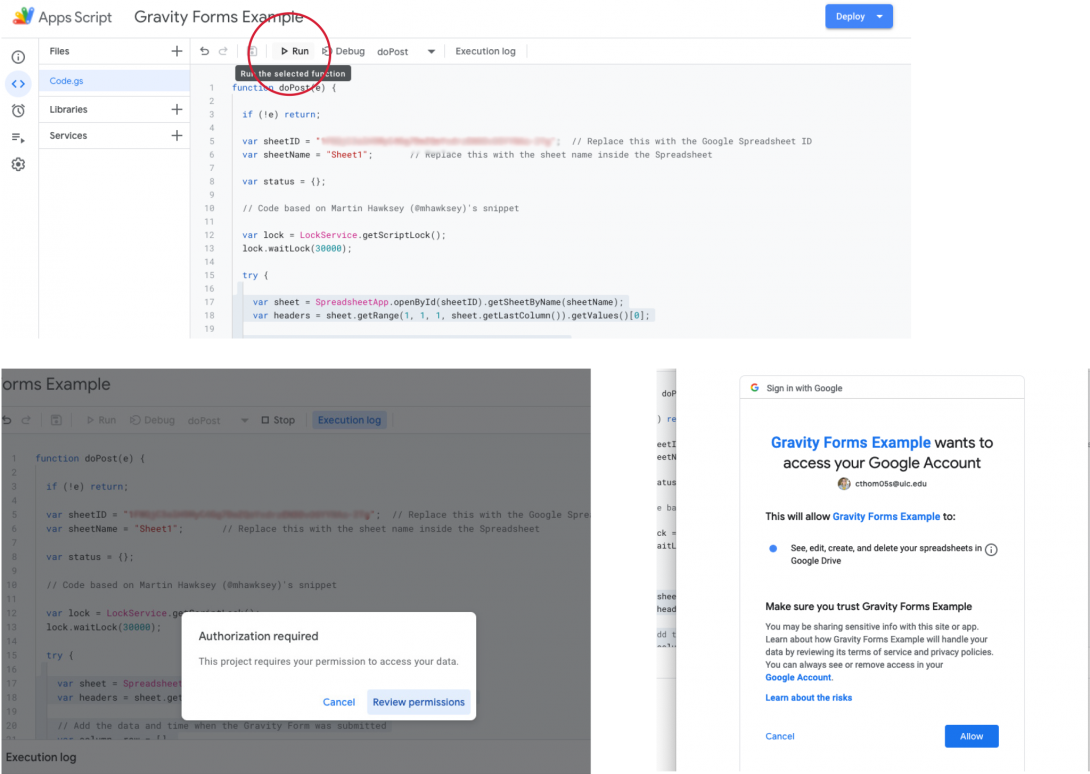
Replace the “GOOGLE_SPREADSHEET_ID” AND “Sheet1” portions with your Sheet ID and sheet name between the quotation marks. Copy all of the text below and Save the project.
function doPost(e) {

if (!e) return;

var sheetID = "GOOGLE_SPREADSHEET_ID";  // Replace this with the Google Spreadsheet ID

var sheetName = "Sheet1";       // Replace this with the sheet name inside the Spreadsheet

var status = {};

// Code based on Martin Hawksey (@mhawksey)'s snippet

var lock = LockService.getScriptLock();

lock.waitLock(30000);

try {

var sheet = SpreadsheetApp.openById(sheetID).getSheetByName(sheetName);

var headers = sheet.getRange(1, 1, 1, sheet.getLastColumn()).getValues()[0];

// Add the data and time when the Gravity Form was submitted

var column, row = [],

input = {

"timestamp": new Date()

};

for (var keys in e.parameter) {

input[normalize_(keys)] = e.parameter[keys];

}

for (i in headers) {

column = normalize_(headers[i])

row.push(input[column] || "");

}

if (row.length) {

sheet.appendRow(row);

status = {

result: "success",

message: "Row added at position " + sheet.getLastRow()

};

} else {

status = {

result: "error",

message: "No data was entered"

};

}

} catch (e) {

status = {

result: "error",

message: e.toString()

};

} finally {

lock.releaseLock();

}

return ContentService

.createTextOutput(JSON.stringify(status))

.setMimeType(ContentService.MimeType.JSON);

}

function normalize_(str) {

return str.replace(/[^\w]/g, "").toLowerCase();

}
Step 7: Deploy the Code as a Web App
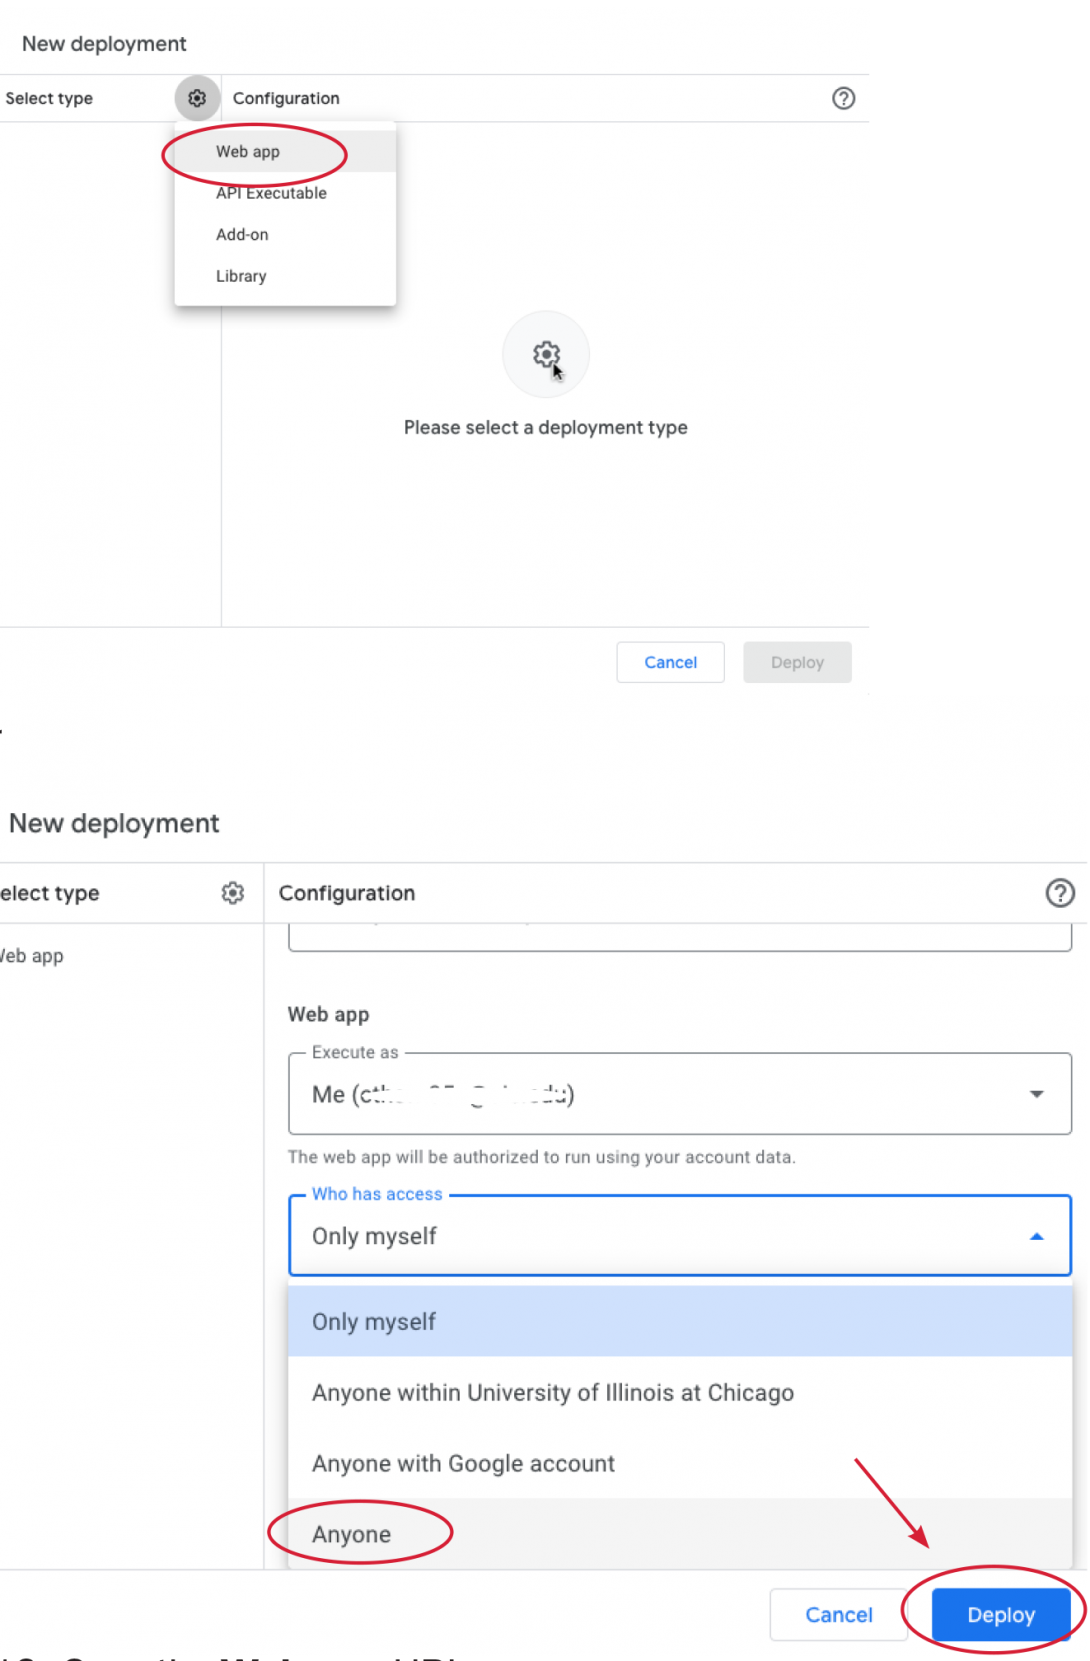
You can now deploy the script in order to get the script URL for use in your Gravity Form.
- Use the “New Deployment” option and select “Web App” as the Type.
- Under Who has access, make sure Anyone is selected. Then deploy.
- Once it is deployed, you can copy the Web App URL in the confirmation screen.
Step 8: Create the Gravity Form Feed
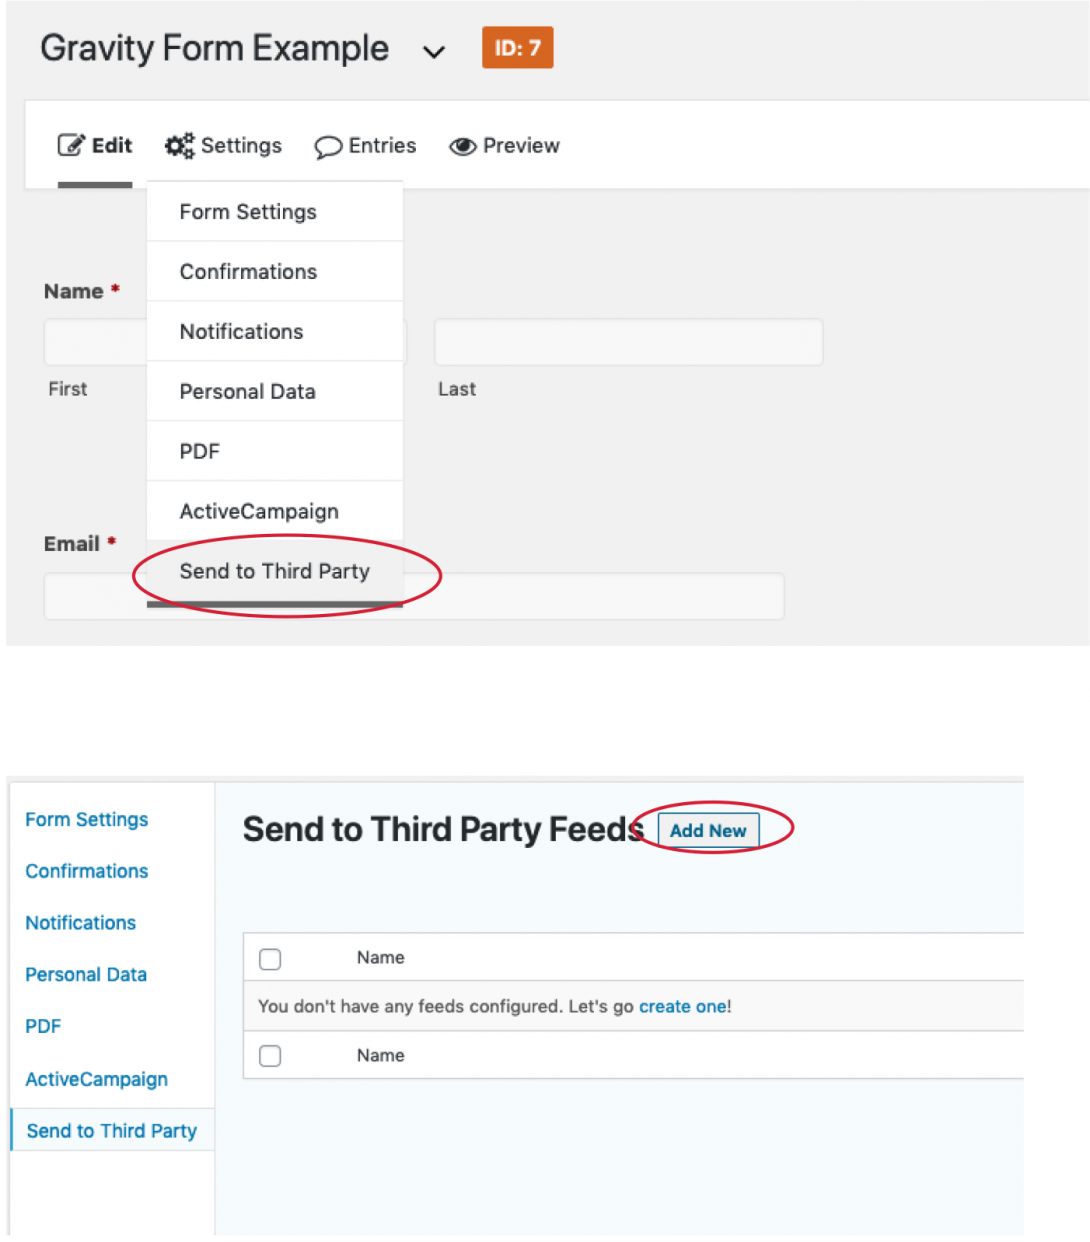
In your form go to Settings and select the option to Send to Third Party.
Add a New Feed.
Step 9: Name Your Feed and Map the Fields
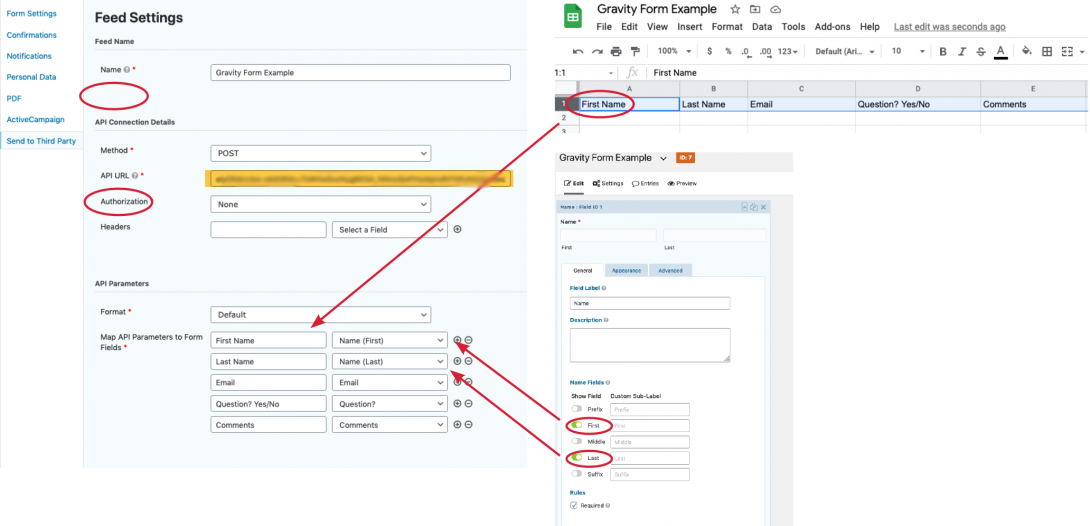
- Name your feed.
- Paste the Web App URL in the API URL field.
- Map API Parameters to Form Fields.
- Add a new row for each field you have in your form. Use the header column names from your Google sheet fields in the left column of the API parameters.
- Note: when including the Name field, make sure the right-hand column matches the name selection in the Gravity Form.
- Update your form to save your settings
Step 9: Test Your Form
You can test your form using the Gravity Forms Preview option. After you submit the form, check your Google Sheet to see if the data was added in the correct columns.